Saturday, March 30, 2013

Toyota Service Bulletin Shock Absorber Replacement Criteria
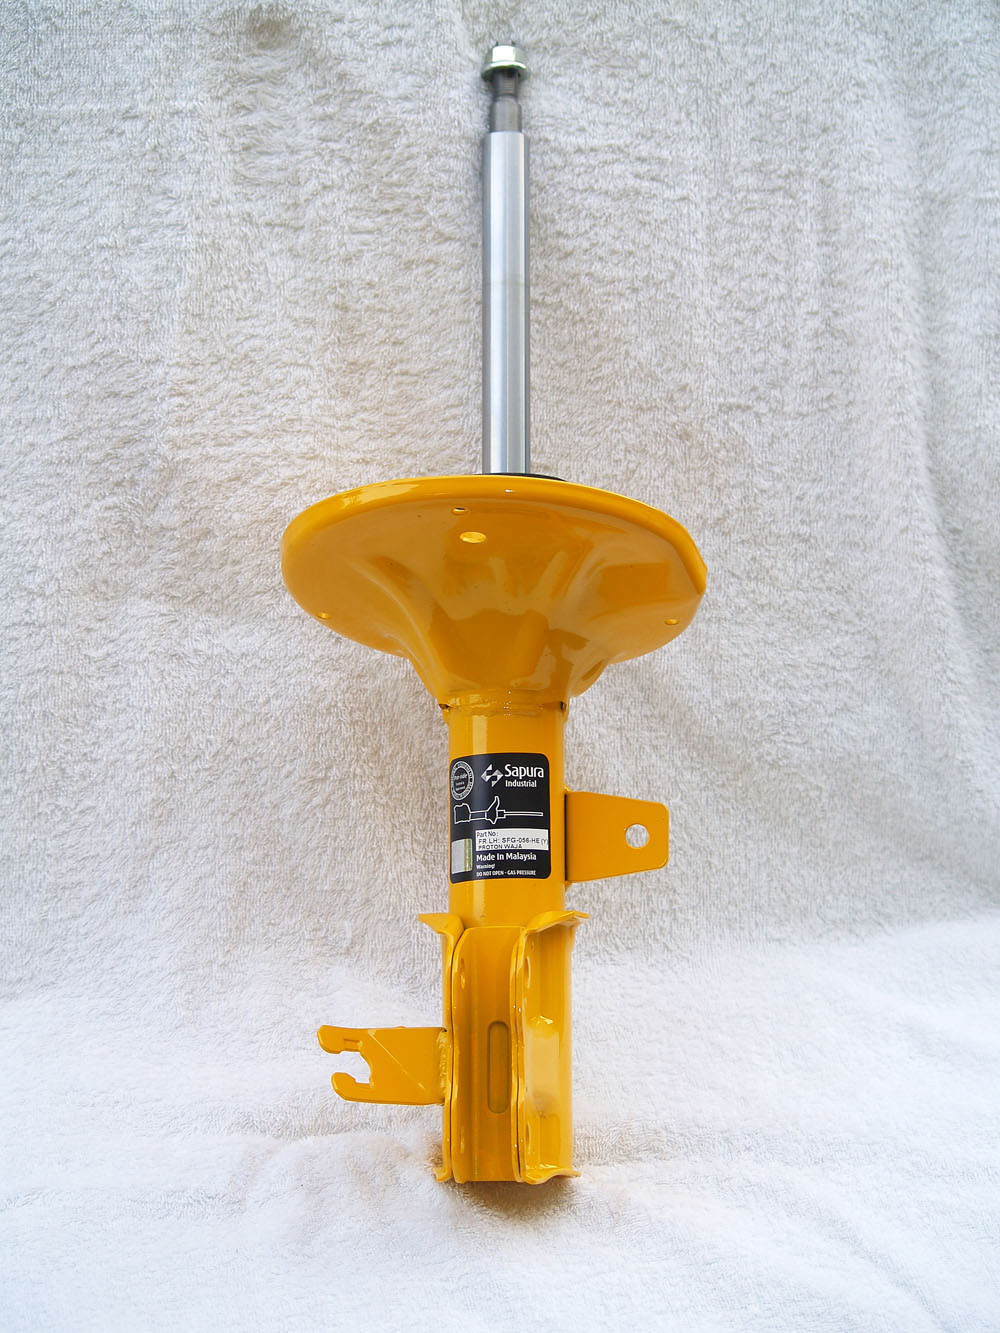
https://blogger.googleusercontent.com/img/b/R29vZ2xl/AVvXsEi8shw19Yo8B4jg9I7saAdhqY-yY4rXvwOgCSejI_8lRSneyO2QgTrJgRaoK5NJP9tOmIyiFcTwzuuF4WRu1Rq2rQ3D_WQHCysOiKf50vZkFPa7qtKUVYgfWoOqRcxfT28thRnvjq5oSVw/s1600/Shock+Absorber+5.jpg

The purpose of this TSB is to provide a quick reference to assist in making easy judgements regarding shock absorber and strut replacements.
Applicable Vehicles: 2006 – 2007 model year Toyota vehicles.
Condition: Slight oil seepage from oil seal case
Action: Normal oil evaporation — NOT necessary to replace the shock absorber

Condition: Moderate oil seepage from oil seal case
Action: Normal oil evaporation — NOT necessary to replace the shock absorber

Read more...

BMW Group Recycling Concept Manuals

https://blogger.googleusercontent.com/img/b/R29vZ2xl/AVvXsEiTBkLGFLCqhcZbADxmfMfoGzPXftyB7JmWLEoNqxqXSGerhVPxOkWqEs4qIn6BPhiqtnG6r8YxPuGNr1E-M3ZL_CkwyK65w0OjJd8wfR_1Nm3hZDzsx59u4qR8FAyQS8fCD30EbHQ9vpol/s400/The+2006+BMW+M6+-+BMW+Performance+Parts,+Aftermarket+Parts+5.jpg

Sustainability ensured by the ecologically responsible use of resources and materials has been the fundamental policy of the BMW Group for many years. Long before lawmakers introduced appropriate legislation, the BMW Group had developed exemplary processes and methods for the sensible use, recycling and disposal of materials as part of a comprehensive recycling concept.

Sustainability has been a firm element of the BMW Group’s corporate philosophy for many years and is one of the Group’s overriding corporate objectives. This consistent orientation has been duly recognised and acknowledged worldwide: Ever since the introduction of the Dow Jones Sustainability Group Index in 1999 as the world’s most significant stock index for companies pursuing a process of sustained management, the BMW Group has been the leading company in the automotive industry ranking No 1 each year. This recognition of BMW’s sustainability strategy by the financial world is reflected within the Company inter alia by a thorough and comprehensive recycling policy.
The BMW Group not only promotes the efficient use of resources within the entire production process as well as the efficient recycling of end-of-life vehicles in accordance with environmental requirements, but also leads the way in recycling-oriented product design. Such “design for recycling” is indeed one of the three interacting core elements underlying the BMW Group’s recycling strategy. The other two core elements are the designation of materials and the Recycling and Dismantling Centre (RDC) in Lohhof near Munich, which is being upgraded to the status of a fully-fledged competence centre and technology forum for all questions of vehicle recycling.

The BMW Group follows a clearly specified procedure in designing parts and components for recycling. To meet recycling standards to the best possible extent from the very beginning in the design phase, recycling specialists first determine the demands made of the components involved. Then, cooperating with construction engineers, they develop solutions within a team. This partnership of interdisciplinary development continues throughout the entire process of product creation, that is from the first concept for a new model all the way to production standard. Benchmarks achieved in the process such as the time required for dismantling or the accessibility of components are revised time and again as work progresses.

Read more...

ACURA Service Bulletin Belt Tension Gauge Calibration and Repair

https://blogger.googleusercontent.com/img/b/R29vZ2xl/AVvXsEhnozHcdtDq0wW65FnqwPOXCzrLneB5CBATYADHM-XeGpKyTr_bQrgZQQDmYFQ7DlsOfdwv6XXdff0PkGfJFR4dmoFPZVFpVbUg-QBJAY7I7YxgfZRbpBjO_4sxOry3h6EgsA5piFNFti0/s400/Acura_TSX_ASpec.jpg

Drive belt tension can be critical to the bearing life of the A/C compressor, alternator, etc. Tension should be checked and adjusted when a new belt is installed, and when a used belt is removed and reinstalled during a repair. For that reason, each Acura dealership is being sent a Belt Tension Gauge Set (T/N 07TGG-001000A). This set contains:
Belt tension gauge (T/N 07JGG-001010A)
Belt tension gauge extension cable
Belt tension gauge checker (T/N 07TGG-001010A)
Plastic pouch and instruction manual
Refer to the appropriate service manual for drive belt tension specifications and procedures.

CALIBRATION
The calibration of the belt tension gauge should be checked regularly. Use the Belt Tension Gauge Checker included in the Gauge Set. If needed, additional checkers may be ordered through normal parts ordering channels. The part number is 07TGG-001010A.
Procedure
1. Push the handle and slide the checker into the gauge. Position the checker as shown.
2. Release the handle and read the tension value on the Kg scale.
3. Compare your reading to the value etched on the checker. Your gauge is in calibration if it is within ±3 kg of the checker value.

Read more...

Friday, March 29, 2013

Chrysler Customer Specific Requirements

Chrysler Customer Specific Requirements

Short Description

Organizations shall submit a PSW in accordance with table 3.2 in the PPAP manual. and in compliance with Chrysler’s “Forever Requirements” process. …

Website: www.iaob.org | Filesize: 278kb

Content
Chrysler
Customer-Specific Requirements
For Use With PPAP 4th Edition
October 2007
1 . Chrysler 2007 - All rights reserved
1 Chrysler - Specific Instructions
Unless superseded by specific written direction from a Chrysler Procurement and Supply
representative, or by engineering drawing and specification requirements, the following
instructions apply.
1.1 Submission Levels
Organizations providing parts to a Chrysler Assembly plant shall follow the guidelines for
Submission Level 4.
Organizations providing certain designated parts to a Chrysler Component or Powertrain
plant shall follow the guidelines for Submission Level 2, or as otherwise specified by the
receiving plant.
In cases where Chrysler requires a bulk material submission, the organization shall
reference the bulk material section in the PPAP manual.
1.2 Submission to Customer
Organizations submitting their PSW’s for PRODUCTION PARTS designated for use at
any Chrysler production facility shall utilize the Powerway website available at
www.powerway.com. Organizations shall comply with all AQP methodology
requirements in Powerway.
?Organizations providing material for Chrysler S1 and subsequent PILOT BUILDS
shall also submit a PSW utilizing the above directions.
?Organizations shall submit a PSW in accordance with table 3.2 in the PPAP manual
and in compliance with Chrysler’s “Forever Requirements” get here

Read more...

NISSAN 350Z Track manual Coupe

https://blogger.googleusercontent.com/img/b/R29vZ2xl/AVvXsEjpYXcz8kYBwZo6F9n2gfOH_uQDCEtyISUv2NcmnsJ5VmJe2aIBXV0NyllsQGt2mhSU3Po1cEwuNoM_34evJzS-tVsIn-lKiWeywEifJjGopbRIEDDjLpKJmx7lllZbTBXaWkxMfixgUqDC/s400/Nissan+350+Z+Roadster++image002.jpg

Short Description
The tradition of Nissan Z coupes stretches way back to 1970 when the legendary (Datsun) 240Z coupe first appeared. Buyers immediately took to the 240Z as not only did it offer a cheaper alternative to sports cars such as Porsches and Jaguar E-types, it also looked good, it had the right credentials (rear wheel drive, independent suspension and a punchy six-cylinder engine) and it provided plenty of driving enjoyment.

In later years Z coupes grew larger and more powerful, yet they lacked the raw-edged sporty appeal of the earlier cars and the model line finished with the 300ZX in 1996. The turbocharged four cylinder 200 SX has done a good job providing an affordable Nissan sports coupe, however it’s the 350Z’s job to re-ignite the Z-car passion with its upto- the-minute styling, its latest technology mechanical specifications and a standard equipment list that should please all.


Read more...

Thursday, March 28, 2013

Lamborghini Murcilago LP 670 4 SuperVeloce Specification

https://blogger.googleusercontent.com/img/b/R29vZ2xl/AVvXsEiLa_wDphal3dagcVE_gS7SF1rjl6P7_tq7toupoChXE5gTZDrqs_XdZon2MC1YEsoMrEDcWqg4gbqY47yLe8UcKNHQq7Z79S2Jgwqv2bKIuJ3GHWOl6qVYu6j7EW2rZWFwc4fzi1Gbraq4/s400/Lamborghini-Murcielago-LP-670-4-Super-Veloce.jpg

A true performance oriented driving car. Murciélago LP 670-4 SuperVeloce Brand name:
- Murciélago: the model from which the car origins
- LP: Longitudinale-Posteriore (longitudinal-rear)
- 670: engine power in hp
- -4 recall to the 4 wheel drive transmission
- SuperVeloce: the name of the derivate version of models range

- Dedicated front fender, bumper and grills
- Dedicated rear bumper and grills
- Dedicated side rocker covers
- New design forged rims named “Ares”
- Dedicated Transparent engine bonnet
- Dedicated exhaust pipe
- Fixed rear wing
- Fixed rear big wing (available as option)
- Superveloce side logo
- Superveloce big side logo (available as option)
- Dedicated side label

Interior colours and trim
Availability of 4 different interior trims related to the 7 exterior colours
Bianco Isis - Bianco Canopus (available as option)
- All black Alcantara SuperVeloce in combination with visible carbon fibre (CFK)
- Dedicated Y pattern design starlight grey colour on seats, roof lining
- SuperVeloce logo embroidery Grigio Phoenix on door pillow and headrest
- Stitching Nero Perseus


Read more...

2002 Pontiac Sunfire User Guide

This manual (2002 Pontiac Sunfire User Guide) includes the latest information at the time it was printed. We reserve the right to make changes after that time without further notice. For vehicles first sold in Canada, substitute the name “General Motors of Canada Limited” for Pontiac Division whenever it appears in this manual. Please keep this manual in your vehicle, so it will be there if you ever need it when you’re on the road. If you sell the vehicle, please leave this manual in it so the new owner can use it.

Table of content 2002 Pontiac Sunfire owners manual maintenance schedule
  • Seats and Restraint Systems
  • Features and Controls
  • Comfort Controls and Audio Systems
  • Your Driving and the Road
  • Problems on the Road
  • Service and Appearance Care
  • Maintenance Schedule
  • Customer Assistance Information
download 2002 Pontiac Sunfire owners manual maintenance schedule
Read more...

2007 Pontiac Solstice User Guide

2007 Pontiac Solstice User Guide Manual contains the information you need when installing, setup, setting, configuring, maintenance and troubleshooting the 2007 Pontiac Solstice.

This manual includes the latest information at the time it was printed. We reserve the right to make changes after that time without further notice. For vehicles first sold in Canada, substitute the name “General Motors of Canada Limited” for Pontiac Division whenever it appears in this manual. Please keep this manual in your vehicle, so it will be there if you ever need it when you’re on the road. If you sell the vehicle, please leave this manual in it so the new owner can use it.

Table of content 2007 Pontiac Solstice owners manual maintenance schedule
  • Seats and Restraint Systems
    Front Seats ~ Safety Belts ~ Child Restraints ~ Airbag System ~ Restraint System Check
  • Features and Controls
    Keys ~ Doors and Locks ~ Windows ~ Theft-Deterrent Systems ~ Starting and Operating Your Vehicle ~ Mirrors ~ OnStar® System ~ Storage Areas ~ Convertible Top
  • Instrument Panel
    Instrument Panel Overview ~ Climate Controls ~ Warning Lights, Gages, and Indicators ~ Driver Information Center (DIC) ~ Audio System(s)
  • Driving Your Vehicle
    Your Driving, the Road, and Your Vehicle ~ Towing
  • Service and Appearance Care
    Service ~ Fuel ~ Checking Things Under the Hood ~ Rear Axle ~ Bulb Replacement ~ Windshield Wiper Blade Replacement ~ Tires ~ Appearance Care ~ Vehicle Identification ~ Electrical System ~ Capacities and Specifications
  • Maintenance Schedule
  • Customer Assistance Information
    Customer Assistance and Information ~ Reporting Safety Defects
  • Index
download 2007 Pontiac Solstice owners manual maintenance schedule
Read more...

Wednesday, March 27, 2013

1988 – 1991 BMW 325iX Electrical Troubleshooting Manual

The BMW 325ix was produced from 1988 to 1991, and featured all-wheel drive. android market . It was available as a two-door (saloon) or a four-door (sedan) and as touring. The bmw 325iX wiring diagram electrical schematics following article provides detail procedures for maintaining, inspection, trouble diagnose, and repairing the 1990 BMW 325iX Electrical System.This manual is divided into following sections: Index, How to Use This Manual, Wire Size Conversion Chart, Wiring Diagram and Electrical Parts Symbols, Systematic Troubleshooting, Connector Views, Power Distribution Box, Fuse Data, Component Location Chart, Component Location View, and Splice Locations Views.This manual also covers topics on: Power Distribution System, Charging and Starting System, Electronics Injection System, Supplemental Restraint System, Brake Warning System, Antilock Braking System, Power Mirror, Central Locking, Power Windows, Seats, Sunroof, Body Electrical System, Wiper and Washer, Instrument Cluster, Active Check Control, Light Switch Details, Headlight, Turn and Hazard Lights, Heating and Air Conditioning, Radio, Antenna and Power Antenna, etc. Here is a quotation from the voltage drop testing section.Wires, connectors and switches are designed to conduct current with a minimum loss of voltage. A voltage drop of more than one volt indicates a problem. Affiliate Marketing . To test a voltage drop, connect the voltmeter leads to connectors at either end of circuits suspected problem area. The positive lead should be connected to the connector closest to the power source. The voltmeter will show the voltage drop between these two points.

Download: 1988 – 1991 BMW 325iX Electrical Troubleshooting Manual Harness and Schematics
Read more...

2002 FORD Explorer Mountaineer Workshop Service Repair Manual

2002 FORD Explorer/Mountaineer Workshop Service Repair Manual. Since the engine is not free-wheeling, timing procedures must be followed exactly or piston and valve damage may occur. 1. Workshop Service Repair Manual (6019). For additional information, refer to Engine Front Cover in this section. 2. NOTE: Procedure is for either RH or LH ignition coil (12029); LH ignition coil is shown. Disconnect the ignition coil electrical connector and remove the retaining bolt. 3. Tilt the coil away from the fuel injection supply manifold. 4. Remove the ignition coil. 5. NOTE: Remove any foreign material from the spark plug wells with compressed air before removing the spark plugs. Remove the spark plugs. 6. Position the lobe of the camshaft up. 7. Install the special tool between the valve spring coils to prevent valve stem seal damage. 8. NOTE: The roller followers are positional. Mark the followers for installation in their original locations

Download: 2002 FORD Explorer/Mountaineer Workshop Service Repair Manual
Read more...

2011 Mazda 3 Owners Manual

Remember that your Mazda Dealer knows your vehicle best. Your dealer has factory-trained technicians, recommended special tools, genuine Mazda replacement parts and is dedicated to your complete satisfaction. Because subsequent owners require this important information as well, this publication should remain with the vehicle if it is sold. This manual will familiarize you with operational, maintenance and safety information about your new vehicle. It is supplemented by a Warranty and Consumer Information manual that provides important information on all warranties regarding your vehicle. We urge you to read these publications carefully and follow the recommendations to help assure enjoyable and safe operation of your new vehicle.

Mazda offers a great variety of options, components and features for its various models. Therefore, some of the equipment described in this manual, along with the various illustrations, may not be applicable to your particular vehicle. The information and specifications provided in this manual were accurate at the time of printing. Mazda reserves the right to discontinue or change specifications or design at any time without notice and without incurring any obligation. If you have questions, always check with your Mazda  dealer. We assure you of our continuing interest in your motoring pleasure and satisfaction in your Mazda vehicle.
Read more...

Alfa Romeo 155 Q4 MANUEL DESREPARATION Staller

Une attention spéciale a été consacrée à la réalisation des procédures de recherche des pannes a la fin de chaque Groupe. Elles s’ajoutent a l’expérience irremplaçable du technicien et fournissent une aide pour l’identification et l’ehmination de la panne en partant directement du fonctionnement défectueux reperb par le technicien, et en exbcutant une série de tests sur le systhme intbressb par la panne. Ce manuel se divise en chapitres (GROUPES) concernant les groupes composant la voiture. En vue du repérage rapide du groupe en question, se rapporter au carton diviseur initial. Chaque groupe prévoit un index analytique et un index illustrb, pour rendre plus aisée la recherche du sujet requis, suivis d’une courte description et des procédures de “depose/repose”, “démontagehemontage” et “contrôles et réglages”.


Download: Alfa Romeo 155 Q4 MANUEL DESREPARATION Staller
Read more...

Installation Manual TWM Performance Short Shifter 2009 Toyota Corolla

https://blogger.googleusercontent.com/img/b/R29vZ2xl/AVvXsEibhIg386ljIGNQCdRXKJb61jt_kh34Il3OG3BLCbG9YOPNxBByzk6f7q-4nrnynQNFFC2hwf7mO9atwvoAAUhMdrCoB32uM9hG0Lb6qj59x9w89JDHneEysspQpjbOMpo_JgjdVEPZtJg/s400/2009+Toyota+Corolla+XRS.jpg

Please Note: It is preferable to park on a flat surface, as you will have to engage and
disengage the hand brake and shift from gears to neutral. If you cannot do so and are obliged
to install the short shifter on a slightly inclined surface, place wooden blocks in front and
behind the wheels to prevent the car from moving while you’re working. Please read this
manual completely before beginning to work on your car.
Estimated Installation Time: 60 minutes shifter only, 75 minutes with base bushings
Tools required:
• Flat head screw drivers (small and large)
• Philips head screw driver
• Hammer
• Flash light or shop light **Recommended
• Needle nose pliers
• Rotary cutting tool (Dremel Tool) **Recommended
• Safety glasses
• Shop towels or rags
• Metric socket set (with 10mm, 12mm, and 14mm sockets) and a ratchet with extension
• Punch set (screwdrivers may be substituted)
• Bench Vise
• All purpose automotive grease (white Lithium based grease preferred)

Get the file Download here
Read more...

2005 Audi All new A4 Maintenance Schedule

2005 Audi All-new A4 Maintenance Schedule.This Maintenance Service Circular AMS-05-26 dated October 20, 2005 supercedes Maintenance Service Circular AMS-05-02 dated February 3, 2005 containing Perfect Delivery Inspection Procedure, Inventory Maintenance Checklist, Suggested Repair Times and Scheduled Maintenance Intervals for the All-new 2005 Audi A4 Maintenance Schedule (USA Vehicles Only)

Note: Perfect Delivery Inspection and Inventory Maintenance Checklist suggested maintenance times are applicable to United States only. Updated information: Added 30 Day Inventory Maintenance Checklist. For states that require a manufacturer’s statement regarding the delivery inspection procedure, the Perfect Delivery Inspection section of this Circular may be utilized for that purpose. Universal Remote Controls . Marketing Services .  here 2005 Audi All-new A4 Maintenance Schedule
Read more...

Tuesday, March 26, 2013

1999 2000 Porsche Carrera 911 Schematic Wiring Diagram

The wiring diagram available including the lights row for USA/Canada, instrument cluster
and sensor, wipe and wash cleaners, two-tone horns, power window, engine cooling, heating, air conditioning system, mirror adjustment, seat
heating, rear window defogger, sunroof, convertible top drive, sensor
overturn, spoiler extend, parking assistant, central locks, alarm
system, interior monitoring, antilock braking system, tiptronic,
motoelectronic, cruise control, airbag, radio, telephone, PCM, seat and
mirror memory, power supply, ground points, construction components,
connectors, relay support, fuses, and many more.


For more details, find the schematic and circuit diagrams of the vehicle :DOWNLOAD
Read more...

Dodge Magnum Camshaft Timing and Setting Fuel Sync manual Instruction Installation

This eliminates the need for velocity and vacuum to pull the mixture into the chamber. It’s essentially thrown into the chamber. So to begin with timing a camshaft, the motor needs to be set at top dead center of the compression stroke. If you are unsure what this means, remove the valve cover on the driver side, rotate the crank pulley with a 32 mm socket, until you see the intake valve, which is the second valve spring, begin to compress. When I say compress, this means the valve spring is opening the valve. As the valve spring begins to close, the piston will be approaching the top of its travel. The crank shaft pulley/harmonic balancer, will have a mark to indicate top dead center on the timing cover. This Mark will align with the TDC mark on the timing cover just after the intake valve spring closes. Next, using a half inch wrench, remove the distributor and set to the side. With a flashlight, look down inside at the oil pump driveshaft. It will have a slot in the center of the gear. This slot should be pointing towards the number one intake manifold bolt hole. It will almost be front to back, but it will be skewed slightly toward the AC unit. If it is not, using a long flat blade screwdriver, rotate the oil pump driveshaft clockwise until the slot lines up with the number one intake manifold bolt hole. Reinstall the distributor and snug the half inch bolt down. The rotor should be pointing towards the number one cylinder mark on the distributor plate. Reinstall the distributor cap and try to fire the motor over. If the engine idles correctly, then take the vehicle for a test drive. If you do not have any major detonation from pre-ignition, in the last thing to do is to set the sync between the crank shaft sensor and the camshafts sensor. This is done by using a scan tool such as the dealership DRBIII, Snap-0n scanners or that any other top of the line scanner. Setting the sync using an ohm-meter has never proved to be accurate and can be off as much as negative six.

Download
: Dodge Magnum Camshaft Timing and Setting Fuel Sync manual Instruction Installation
Read more...

SERVICE MANUAL 12VDC WALL THERMOSTAT AIR CONDITIONING SYSTEMS ROOFTOP UNITS ONLY

The following chart shows the different electrical connections made by the thermostat during operation. The chart below assumes12VDC(+) is supplied to thermostat Red wire “R” and that 12VDC(-) or ground is supplied to the Blue wire “B” at all times.Thermostats are very sensitive instruments. For accurate temperature control and comfort the following considerations for thermostat locations should be taken into account: 1. Locate the thermostat on an inside wall about five foot above the floor. Pick a dry area where air circulation is good. The thermostat should be mounted within a reasonable distance from the appliance the thermostat will control. This will assure a more accurate temperature relationship between the thermostat and the appliance the thermostat will control. 2. Do not install the thermostat where there are unusual heating conditions; such as direct sunlight, heat producing appliances (television, radio, wall lamp, etc.); or a furnace or air conditioner supply register. 3. Note: When installing or servicing these thermostats the technician should take all necessary precautions not to short any positive wire to ground. Permanent damage to the thermostat may occur. Make sure all connections are good and tight. Loose connections may cause relay chattering which leads to welded relay contacts on air conditioner printed circuit boards. Click here to get SERVICE MANUAL 12VDC WALL THERMOSTAT AIR CONDITIONING SYSTEMS ROOFTOP UNITS ONLY
Read more...

Suzuki Aerio SX Owners manual

Suzuki Aerio SX Owners manual. Suzuki Aerio SX (Manual) The Aerio SX, which stands for “sport crossover,” is a sleek little five-door wagon. It offers the fun of a sports sedan, the load-hauling capacity of a small minivan, and the seating position of an SUV. All at a great price. Plus there’s the excellent Suzuki warranty: seven years or 100,000 miles. It covers the engine, transaxle, transmission and transfer case, and front- and four-wheel-drive systems. Suzuki adds 24-hour emergency assistance and a rental vehicle when an owner’s vehicle is being repaired and allows the warranty to be transferred to new owners. Still, once you get past its interesting styling, this is essentially a journeyman sort of vehicle. It’s powered by a 2.3-liter four bumped up by 10 hp this year to 155 hp. QuadGrip all-wheel-drive is an option (but only with the automatic transmission). Other than the power boost, it stays unchanged for 2004.

Download: Suzuki Aerio SX Owners manual
Read more...

Monday, March 25, 2013

Audi RS6 Sill panel trim removing and installing

Audi RS6 Sill panel trim, removing and installing. Sill panel trim, removing and installing (Audi RS6 only) 1 – Bolt 2 Nm (18 in. lb) 2 – Outer scuff plate After painting, attach -4- to sill panel trim with the tie-clips -13- 3 – Screw 2 Nm (18 in. lb) 10x 4 – Sill panel trim Remove: – Unclip outer scuff plate prior to removing sill panel trim Fig. 1 . – Remove screws -1-, -5-, -7- and -9- – Remove end piece -10- – Route sill panel trim to side. Fig. 1 Outer scuff plate, removing – Unclip outer scuff plate -1- in direction of -arrow- prior to removing sill panel trim – 3-. – For easier installation, moisten sill panel trim clip areas with soapy lubricant. – -2- gluing (adhesive) Fig. 2 Sill panel trim holder – Remove sill panel trim. – Unclip wheelhousing cover form holder. – Remove screws -3- from bracket -2- and remove clips -1- to remove holder. Click here to get Audi RS6 Sill panel trim, removing and installing
Read more...

Mitsubishi OUTLANDER WORKSHOP MANUAL

Mitsubishi OUTLANDER WORKSHOP MANUAL. This workshop manual is subdivided into various group categories. Each section contains diagnostic, disassembly, repair, and installation procedures, along with complete specifications and tightening references. Use of this manual will aid in properly performing any service necessary to maintain or restore the high levels of performance and reliability designed into this Mitsubishi vehicle. This manual is designed for use with theMitsubishi OUTLANDER Service Manual Volume 2, and Volume 3, and the Mitsubishi OUTLANDER Body Repair Manual to provide complete service information for the Mitsubishi OUTLANDER.
When reference is made in this manual to a brand name, number, or specific tool, an equivalent product may be used in place of the recommended item. All information, illustrations and specifications contained in this manual are based on the latest product information available at the time of publication approval. The right is reserved to make changes at any time without notice. Click here to get Mitsubishi OUTLANDER WORKSHOP MANUAL
Read more...

BOEING 737 FLIGHT CONTROL SYSTEMS

BOEING 737 FLIGHT CONTROL SYSTEMS. The primary flight controls, ailerons, elevators and rudders, are hydraulically powered. Hydraulic power is provided from hydraulic systems A and B; either system can operate all primary flight
controls. ¡ The ailerons and elevators may be operated manually if required. The rudder may be operated by the standby hydraulic system if system A and/or B pressure is not available. ¡ The ailerons are assisted by flight spoilers for roll control. The spoilers are hydraulically powered from system A (inboard) and B (outboard) and operate proportionally with aileron movement. The horizontal stabilizer may be positioned by electric trim, or manually through the trim wheels. During automatic flight, the autopilot trim controls the stabilizer position. ¡ The Surface Position Indicator (if installed), located on the Captain’s instrument panel, or, on 737NG the system display on the lower Display Unit, displays deflection of the ailerons, rudder and elevators. Aerodynamic braking is provided in flight by the flight spoilers operating as speedbrakes. On ground, flight spoilers and ground spoilers are used in combination to destroy lift. ¡ High lift for take-off and landing is provided by trailing edge flaps and leading edge flaps and slats (LE devices). Normally, these surfaces are extended and retracted by hydraulic system B. Alternatively, the trailing edge flaps may be extended and retracted electrically. The leading edge devices may be extended by the standby hydraulic system. No alternate retraction system is provided for the leading
edge devices. ¡ The autoslat system improves handling qualities at high angles of attack during operations with flaps
set at positions 1 through 5. Autoslat operation deploys the slats from intermediate to full extended
position prior to stick shaker activation.

Download
: BOEING 737 FLIGHT CONTROL SYSTEMS
Read more...

FORD CROWN VICTORIA OWNERS MANUAL

Table of Contents Maintenance and Specifications Engine compartment Engine oil Battery Engine coolant Fuel information Air filter(s) Part numbers Maintenance product specifications and capacities Engine data 232 234 236 239 241 247 263 264 266 269 Accessories Index 272 274 All rights reserved. Reproduction by any means, electronic or mechanical including photocopying, recording or by any information storage and retrieval system or translation in whole or part is not permitted without written authorization from Ford Motor Company. Ford may change the contents without notice and without incurring obligation.

Download: FORD CROWN VICTORIA OWNERS MANUAL
Read more...

Celiera Split Wall Mounted Air Conditioner User Manual

Celiera Split Wall-Mounted Air Conditioner User Manual. Air conditioners are pieces of high value. In order to ensure your lawful rights and interests, please have
the professional technicians to do the installation for you. This Instruction Manual is the universal-purpose version for the models of split wall-mounted air conditioners manufactured by our Co. The appearance of the units that you purchase might be slightly different from the ones described in the Manual, but it does not affect your proper operations and usage. Please read carefully the sections corresponding to the specific model you choose, and keep the Manual properly so as to facilitate your reference at later time. Instructions for Installation . Make sure to have the professional after-sale service persons of our company or the authorized dealers to install the units before you use. 1. The units are not to be installed at places where there might be leakage of combustible gases. Addition to the user manual: The appliance is not intended for use by young children or infirm persons without supervision; Young children should be supervised to ensure that they do not play with the appliance. Click here to get Celiera Split Wall-Mounted Air Conditioner User Manual
Read more...

Sunday, March 24, 2013

SHIRE 09 50 Workboat Riverboat Engine Owners Manual

SHIRE 09 50 Workboat & Riverboat Engine Owners Manual This manual has been compiled to help you to operate your engine and its associated parts with safety and pleasure. Please read it carefully and familiarise yourself with the engine and its parts before operation. To ensure that you have been registered for the full two year warranty, please ask your boat builder or engine supplier to provide your portion of the registration document. The warranty period on major electrical components such as alternators and starter motors is 12 months only. Engines fitted with alternator boost charge systems or any other electrical management system, other than those approved by Barrus, are not covered by warranty. There is a five year warranty on major engine components, one year on alternators and other electrical components and two years (or 2000 hours, whichever occurs first) on all other components. It is your responsibility to fill in the delivery report found at the back of the Yanmar Warranty Handbook to qualify for the warranty. E.P.Barruhttp://www.blogger.com/img/blank.gifs reserve the right to reject warranty claims if this is not completed. Failure to use recognised dealers or marine engineers, approved Shire parts or to maintain the recommended service schedule will invalidate your warranty. E.P.Barrus reserves the right to change the specification of its products and manuals without prior notice. Depending upon the equipment specification of the engine and accessories fitted, there may be discrepancies with the information presented in this handbook. No claims may be pursued in this respect. THIS MANUAL FORMS AN INTEDRAL PART OF THE ENGINE IT ACCOMPANIES, IF A TRASFER OF TITLE OCCURS, IT MUST ALWAYS BE HANDED OVER TO THE NEW OWNER.

Download: SHIRE 09 50 Workboat & Riverboat Engine Owners Manual
Read more...

Subaru Outback Owner Manual

This 2010 Subaru Outback User Guide Manual contains the information you need when installing, setup, setting, configuring, maintenance and troubleshooting the 2010 Subaru Outback.

Before you operate your vehicle, carefully read this manual. To protect yourself and extend the service life of your vehicle, follow the instructions in this manual. Failure to observe these instructions may result in serious injury and damage to your vehicle.

Table of content 2010 Subaru Outback Owners Manual

    Seat, seatbelt and SRS airbags
    Keys and doors
    Instruments and controls
    Climate control
    Audio
    Interior equipment
    Starting and operating
    Driving tips
    In case of emergency
    Appearance care
    Maintenance and service
    Specifications
    Consumer information and Reporting safety defects
    Index 
download 2010 Subaru Outback Owners Manual
Read more...

VW Golf GLS TDI Owners Manual

This is the last year for the fourth-generation Golf. So as a consequence, it gets no changes except for a software upgrade for its engine-control computer. A fifth-generation Golf went on sale in Europe in 2004, but we Americans will have to wait until 2006 to get it. There are two engine choices in the Golf. There’s the 1.9-liter turbo-diesel that makes 100 hp and 177 lb-ft of torque-available in the GL and GLS-and there’s also the familiar 2.0-liter that makes 115 hp. TheGolf is a bit more expensive than its Japanese competition but offers a luxurious interior, the utility of a hatch, and a decent fun-to-drive rating. The structure is stiff, and although its engines are on the weak side, it goes down the road well enough. Since this is the currentGolf’s last year, be sure to deal hard. Otherwise, wait a year for the entirely new, and more sophisticated, fifth-generation Golf. After a mostly fallow 2005, VW is on a new-model rush, starting with a sixth-generation Passat.

Get from here to download VW Golf GLS TDI Owners Manual

Read more...

2002 Nissan Pathfinder Owners Manual

2002 Nissan Pathfinder Owners Manual -Welcome to the growing family of new NISSAN owners. This vehicle is delivered to you with confidence. It was produced using the latest techniques and strict quality control. This manual was prepared to help you understand the operation and maintenance of your vehicle so that you may enjoy many miles of driving pleasure. Please read through this manual before operating your vehicle. A separate “Service and Maintenance Guide” and “Warranty Information Booklet” explains details about the warranties covering your vehicle and vehicle maintenance schedules. Additionally, a separate Customer Care/Lemon Law Booklet (U.S. only) will explain how to resolve any concerns you may have with your vehicle, as well as clarify your rights under your state’s lemon law. Your NISSAN dealer knows your vehicle best. When you require any service or have any questions, they will be glad to assist you with the extensive resources available to them. READ FIRST — THEN DRIVE SAFELY Before driving your vehicle please read your Owner’s Manual carefully.

Get from here to download 2004 2002 Nissan Pathfinder Owners Manual
Read more...

2009 Dodge Challenger Owner Manual Guide

This 2009 Dodge Challenger manual has been prepared with the assistance of service and engineering specialists to acquaint you with the operation and maintenance of your new vehicle. It is supplemented by a Warranty Information Booklet and various customer-oriented documents. You are urged to read these publications carefully. Following the instructions and recommendations in this manual will help assure safe and enjoyable operation of your vehicle. NOTE: After you read the manual, it should be stored in the vehicle for convenient reference and remain with the vehicle when sold so that the new owner will be aware of all safety warnings. When it comes to service, remember that your authorized dealer knows your vehicle best, has the factory-trained technicians and genuine Mopart parts, and is interested in your satisfaction. HOW TO USE THIS MANUAL Consult the Table of Contents to determine which section contains the information you desire. The detailed Index at the back of this manual contains a complete listing of all subjects. Consult the following table for a description of the symbols that may be used on your vehicle or throughout this Owner’s Manual.

Get from here to download 2009 Dodge Challenger Owner Manual Guide
Read more...

Saturday, March 23, 2013

2003 BUICK Park Avenue Owners manual

2003 BUICK Park Avenue Owners manual, the BUICK Emblem and the name PARK AVENUE are registered trademarks of General Motors Corporation. Canadian Owners You can obtain a French copy of this manual from your How to Use This Manual Many people read their owner’s manual from beginning to end when they first receive their new vehicle. If you do this, it will help you learn about the features and controls for your vehicle. In this manual, you’ll find that pictures and words work together to explain things. This manual includes the latest information at the time it was printed. We reserve the right to make changes after that time without further notice. For vehicles first sold in Canada, substitute the name “General Motors of Canada Limited” for Buick Motor Division Index whenever it appears in this manual. Please keep this manual in your vehicle, so it will be back of the manual. It’s an alphabetical list of what’s there if you ever need it when you’re on the road. If you in the manual, and the Page nUmber Where You’ll find it. sell the vehicle, please leave this manual in it so the new owner can use it. You will find a number of safety cautions in this book.

Get from here to download 2003 BUICK Park Avenue Owners manual
Read more...

BMW 3 5 Series 1983 1991 Service And Repair Manual

The E28 5-Series models were introduced in October 1981, and were superseded
in June 1988 by the revised E34 5-Series range, Touring versions of which
became available from March 1992.
Throughout this manual, E28 models are also referred to as “oldshape”, while
E34 models are designated “new-shape”.
The models covered by this manual are equipped with single overhead cam
in-line four- and six-cylinder engines. Early 316 and 518 models are fitted
with carburettors, but all other models are fitted with fuel injection systems. Transmissions are a five-speed manual, or three- or four-speed automatic.


The transmission is mounted to the back of the engine, and power is transmitted
to the fully-independent rear axle through a twopiece propeller shaft. The final drive unit is bolted solidly to a frame crossmember, and drives the rear wheels through driveshafts equipped with inner and outer constant velocity joints.
The front suspension is of MacPherson strut type, with the coil spring/shock
absorber unit making up the upper suspension link. The rear suspension is
made up of coil springover-shock absorber struts, or coil springs and conventional shock absorbers, depending on model.download BMW 3 & 5 Series (1983 1991) Service And Repair Manual
Read more...

Peugeot Owners manual

The Peugeot Service Plan is provided and administered by Peugeot Citroën South Africa (herein after referred to as PCSA) and is included in the purchase price of the new vehicle. 1.2 The Peugeot Service Plan is designed to take care of the Routine service needs of the new vehicle. 1.3 The Peugeot Service Plan takes the form of a written agreement between PCSA and the purchaser or owner (herein after referred to as the client) of a new Peugeot vehicle. 1.4 Emphasis must be made, and note taken, that this is NOT a Maintenance Plan, as it only covers the costs associated to the routine scheduled services as laid out in the Warranty and Service Record Book. All other costs will be for the owners account. In this Service Plan agreement, unless the context requires otherwise, the words and expressions set out below will have the meaning assigned to them hereunder and similar expressions will have a corresponding meaning:
 download Peugeot Owners manual
Read more...

Rossi Single Barrel Shotgun Owners Manual


Owner’s Manual for the Rossi Single Barrel Shotgun, Single Barrel Rifle, Slug Gun and Matched Pair Never allow a minor to shoot without adult supervision. Never leave a firearm in the possession of a minor. When shooting with a child, make sure to remain close and safely supervise all activities. If you need to leave the area, take the firearm and the child with you. Always make sure to store firearms and ammunition separately. The safety warnings in this booklet are important. By understanding the dangers inherent in the use of anyfirearm, and by taking the precautions described herein, you can enjoy complete safety in the use of your Rossi firearm. Failure to heed any of these warnings may result in serious injury to you or others, as well as severe damage to the firearm or other property. SHOTGUNS, RIFLES and PISTOLS are classified as FIREARMS or DANGEROUS WEAPONS and are sold by us with the specific understanding that we are not responsible in any manner whatsoever for their improper or negligent handling or resale under local laws and regulations.
 download Rossi Single Barrel Shotgun Owners Manual
Read more...

2013 Toyota RAV4 Release Date Redesign and Price

We have the objectives from this organization and we are still looking for the actual 2013 Toyota  RAV4 Release Date for this design but we have across some of the most scintillating functions. The new functions of this design are fantastic when it comes to 2013 Toyota RAV4 Release Date such as petrol intake amount and best aerodynamic.
2013 Toyota RAV4 Release Date, Redesign and Price
2013 Toyota RAV4 Redesign
2013 Toyota RAV4 will keep a absolutely redesign with new overall look and tailored functions. 2013 Toyota RAV4 will be abaft aural a 2013 account from a informed Platform, Sport, and Restricted variations. Noticeable power would basically go abaft to primary about visible. Predict, a Sport adumbration has a information of such an overall approved brume lights and body-color random decrease while a Restricted change dressier personality with a firefox battercake and acuteness tires. The latest version of the Toyota RAV4 EV has a producing variety between expenses of around 100 miles and requires about six time to replenish on a 240V/40A energy replenisher.

2013 Toyota RAV4 Price
2013 Toyota RAV4 Price is starting at $27,000 - $50,610.


2013 Toyota RAV4 Interior
a six-way flexible driving seat contains varying front seat heating units, which expands heaters coverage to the occupant’s spine. The divided lying back seats with foldable center arm rest times flat for increased freight area, with a total freight capacity comparative to the traditional Toyota RAV4 of 73 cu. ft. No interior area is lost in the vehicle due to EV elements. More about the 2013 Toyota RAV4 Release Date

2013 Toyota RAV4 Owners Manual

Download here 2013 Toyota RAV4 Owners Manual.
Read more...

Friday, March 22, 2013

Yanmar LYA LY2 Marine Engine Periodic Inspection Manual

Yanmar LYA / LY2 Marine Engine Periodic Inspection Manual. Daily and periodic inspection are important to keep the engine in its best condition. The following is a summary of inspection and servicing items by inspection interval. Periodic inspection intervals should vary depending on the uses, loads, fuels and lube oils used and handling conditions, and are hard to establish definitively. The following should be treated only as a general standard. Schedule your own periodic inspection plan according to the operational conditions of your engine and inspect every item. Neglect of periodic inspection may lead to engine troubles and shorten the life of the engine. Inspection and servicing at 2000 hours of operation and thereafter require special knowledge and techniques. Consult your dealer or distributor or the Yanmar subsidiary in your region.

download Yanmar LYA / LY2 Marine Engine Periodic Inspection Manual
Read more...

Basic Electricity and Electronics

The student will be familiar with the basic electrical and magnetic principles as applied to transformers. They will also study core and shell-type construction as well as newer methods of building transformers, the principles of operation, and classification of transformers. Cooling methods, tap changers, transformer connections, auto transformers, and reactors, inspection and maintenance and the latest Safety Rules when working with transformers. The student will gain a basic understanding of electric theory, the principle of how electronic tubes work and Federal Law as it pertains to license requirements. Booklet 2 provides more information on electronic tubes and their principle circuit while book 3 illustrates and describes practical electronic circuits. The student is exposed to the latest revision of the NEC (National Electrical Code Blueprint Reading) and how it pertains to single-family dwellings, multi-family dwellings, commercial, industrial, and specialized and hazardous locations. National Electrical & Code Blueprint Reading is designed to enable the student to learn electrical blueprint reading and at the same time receive exposure to and become familiar with applicable sections of the current National Electrical Code.
Click here to Download Basic Electricity and Electronics
Read more...

Microsoft Visio Tutorial

Startup Microsoft Visio (2000, 2002 or 2003) 2. Now you have to choose your Drawing type. First select the ‘Software’ folder and then click on the ‘UML model Diagram’ icon and/or choose “UML Static Structure Diagram” (see Figure 1).For this course we use ‘UML Static Structure’ (this is another term for class diagram). When you choose this, you will see the various shapes for building a UML class diagram on the right of the main window. (When you place your cursor on one of the shapes you will see a short description of it.) 4. Before making a UMLdiagram you’ll may want to change the paper orientation in the main window to landscape by going to File > Page Setup.To change the name of the class you will have to double click on the class. A window ‘Class properties’ will appear (see Figure 3). You can change its name in the name field.Change the name from ‘Class1′ into ‘Patient’.You’ll see that a class rectangle generally has three compartments.

Get from here to download Microsoft Visio Tutorial
Read more...

Nissan 350Z Z33 Series Owners Manual

Nissan 350Z Z33 Series Owners Manual - Wb here guy blog and we hope you will enjoy it very much. . You can also download it below. But I think it will be better if you read the review of Nissan 350Z Z33 Series Owners Manual

This Service Repair Manual for almost 350Z Model Z33 Series from the year 2003,2004,2005 and 2006. This PDF Service Repair Manual Contains Hundreds Of Pages And Includes A Superb Table Of Contents such as ENGINE

Get from here to download Nissan 350Z Z33 Series Owners Manual
Read more...

BMW TV Video Module Owner’s Manual – Basic Operations

To activate the Television Module, press Menu and select Television The equipment selects the program stopped last. In order to leave TV, you press Menu again The following characteristic is to be considered: If the inputs do not take place in the TV menu within eight seconds, the procedure is to be repeated. For your own security the TV picture is displayed only up to a speed of 3 km/h. With certain countries a TV picture is only with vehicle parking brake engaged. You can continue to hear the TV sound while driving even though the picture is disabled. In order to stop the volume, turn the left rotary button until the desired volume is adjusted. As soon as the telephone is engaged, the equipment automatically becomes muted.1. Right rotary button turn or press. The TV menu is faded in 2. Attitudes select 3. Select the desired automatic controller 4. Right rotary button turn, until the desired attitude is reached 5. Right rotary button press, in order to store the attitude. Select TV Standard The television can be used by the multi standard receiver (PAL, SECAM, NTSC) worldwide. The used TV standard is not alike in all countries. They can change your TV receiver over however to all common TV standards. 1. Right rotary button turn or press. The TV menu is faded in 2. Attitudes select 3. Select TV standard. An alphabetically sorted list with country names is indicated. 4. Select the country in which you are located from the list.

Get from here to download BMW TV Video Module Owner’s Manual – Basic Operations
Read more...

Thursday, March 21, 2013

1990 Honda Civic Owners Manual Review

If you have a question where you can find 1990 Honda Civic Owners Manual? The answer is you can get the owners manual here. But before obtain it, let us tell you the review of the car first. Here is proof that selecting the Ten Best Vehicles is difficult than ever: the Honda Civic was not a single option this year. But the whole Honda Civic range again got almost all our ballots on the way to becoming a 1990 Ten Best champion.

The Honda Civic range has a four-door vehicle, a place cart, and a low-slung three-door hatchback. Our four-door EX vehicle carried a cost of $11,950— up from a platform cost of $11, 145—and seemed and forced as if it were a far more costly vehicle. And there in can be found the key of our preoccupation with the Honda Civic: value plus excellent plus generating satisfaction. This car has also become a resource of satisfaction for Northern People in america. Four-door Civics are designed in Marysville and Eastern Liberty, Ohio, by U.S. employees, while hatchbacks are created in Alliston, Ontario, just north of the border.

Read more...